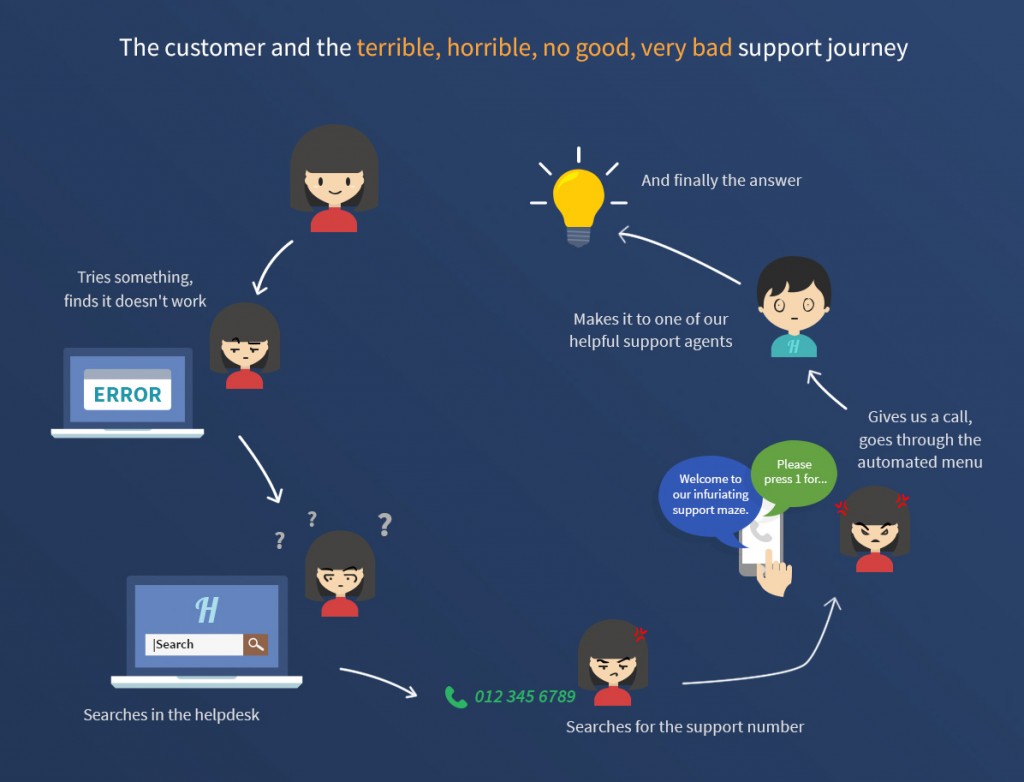
Do you know what your support process looks like to a customer? It’s pretty easy to see what it looks like on your side. Internally, you get a ticket, you do some troubleshooting and send back a reply. Maybe your customer will get a survey once it’s resolved. Easy right?
From the perspective of the customer, it might not have been so easy. They had a problem, tried out some simple problem solving, searched in the help center, filled out a contact form, waited for 6 hours, received a reply back and tried out the steps you suggested. Finally, their problem was solved. The steps in your support journey may look different but without mapping them out, you won’t know. Surprisingly, only 54% of businesses have mapped out their online customer journey, according to Altimeter.

Support journey mapping involves looking at all of the possible touchpoints a customer may have with your support desk. This could involve self-service, calling into your support team or the email chain to a resolution. Many touchpoints might have multiple entries. For example, did they receive an invoice via email and reply back to it with a question? Or did the customer check their bank account and email the support team directly to confirm?
Tackling the journey mapping process with your support team may seem difficult but your first-hand customer knowledge is essential. Below, we break down the process step by step, using our experiences to make it manageable. When you take a closer look at your customer service processes, you’ll be able to see where friction exists. This is a key first step to improving the customer experience.
How to Map Your Support Journey
Expected time: 2-4 hours
What You’ll Need:
- A whiteboard or flat surface
- Sticky notes
- Markers
- Support agents
- Unified support data (optional)
- Cross-functional team members (optional)
Step 1: Choose a Common Flow
Decide which piece of the journey you’d like to focus on. Mapping the entire support experience can feel overwhelming. A common one we like to start with is the cancellation flow. This might seem counter-intuitive but a good cancellation flow can actually be your best mechanism against churn.
Other pieces of the support experience you may want to try mapping include:
- Installation and onboarding
- Checkout Assistance
- Bug Reporting
- Feedback
To choose the best support journey to start with, take a look at the most common requests your support team receives.
Step 2: Walk in Your Customers’ Shoes
This next piece is best done in one chunk of time in front of a whiteboard. We also recommend using sticky notes.
We love post it notes. #lifeatkayako pic.twitter.com/wTKuXNBU6D
— Sarah ???? (@sarahleeyoga) May 13, 2015
Once you’ve decided which scenario you’d like to start with, pull up the first screen your customer sees. This might be your website or the app listing.
Write the customer’s first step on a sticky note and put it up on the wall. Decide on the next action your customer might take if they are having trouble. Is there a help button that they click? Jot that down on the next sticky note, then put it to the right of the first one.
Continue walking through the steps a customer will take to find a resolution – even emailing or calling your own support team if needed. If you find anything in the process that’s broken (for example, a missing image in a support article or an out-of-date IVR option,) make a note of it and move on.
Always involve front line staff in support mapping. They have a great idea of what customers go through for support.
Remember that you are mapping the journey as it currently stands, not as you’d like it to be. If there’s confusion in a step toward resolution, err on the side of caution and write down both the step the customer should take, and any others they could take (e.g., the ideal solution is to search for an article but a possible solution is to click on FAQs).
Step 3: Distinguish Between On and Off Stage
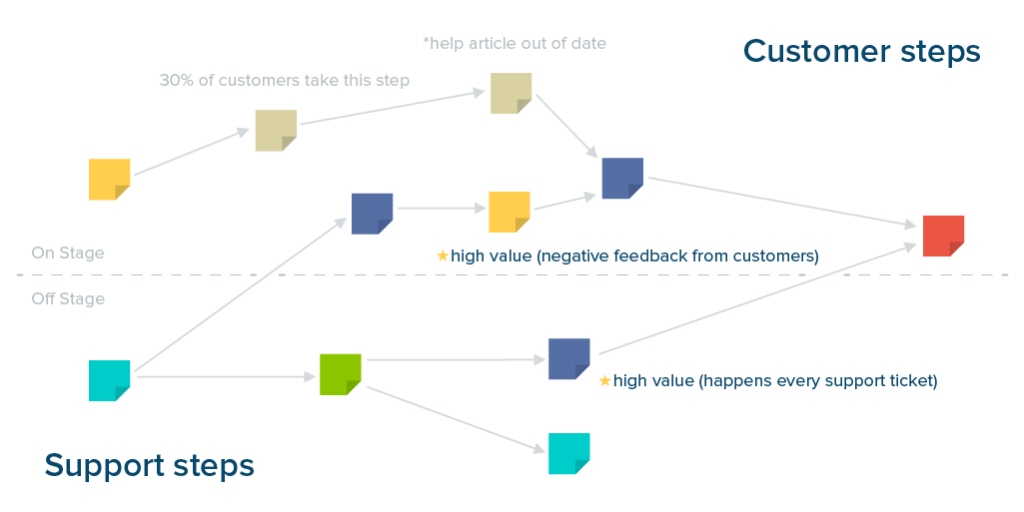
Once you’ve gone through the flow as a customer, add in any touchpoints that might happen “off stage.” These are events that the customer may not see but are still involved in the support process to get them to the resolution. These events aren’t direct interactions with the customer but you may find a pattern where you can save time answering a customer’s request. An example may be the logging of an error or an automated flag to notify a customer success manager.
You can also add any events that happen on the support side. These would include things like opening a new customer account or checking transaction history.
Draw a horizontal line across your map. Keep any customer-facing interactions above the line and any hidden ones under the line. Pay attention to everything going on behind the scenes that your customer isn’t seeing. A lack of transparency will cause frustration.
Step 4: Highlight High-Value Touchpoints
Great, you’re almost there! Take note of any events that are of higher importance. Maybe you’ve had several customers complain about one step or notice almost all customers must land on your help center page before contacting you. If you have data about where your tickets come from, or which tickets have the lowest satisfaction rating, pull that information out and add it as annotations to your map.

These are the touchpoints that will have a big impact on your customer experience. Even improving the process slightly will help your customer get answers more effectively.
Step 5: Make a Plan and Measure
Once you’ve identified the high-value touchpoints and areas of concern, choose one to improve. Make a hypothesis and decide on the metrics that will tell you if your experiments are successful. Hypotheses need to be falsifiable and quantifiable.
We suggest using the following format to form a hypothesis:
We believe that (experiment) will result in (expected outcome). We will know we have succeeded when (measurable signal).
Hypothesis: “We believe that moving the cancellation button higher on the page will result in fewer customers emailing us to ask how to cancel. We will know that we have succeeded when emails about cancellations are reduced by 50%.”
What to measure: # of tickets about cancellations, total number of cancellations
Hypothesis: “We believe only including our phone number on support articles that mention billing will result in fewer technical support calls. We will know that we are successful when technical support calls are reduced by 30%.”
What to measure: # of phone calls about technical support, total number of customer contacts
Hypothesis: “We believe that increasing the size of the search bar will encourage more customers to try searching before contacting us for support. We will know that we are successful when the ratio of help center searches to tickets created doubles.”
What to measure: # of searches, # of tickets
Once you come up with your hypothesis, start testing and set a time limit for the experiment. For example, if you’re trying to improve a billing issue, you might want to wait a full billing cycle to determine if the test had an impact.
Step 6: Repeat
Being able to continually improve your customers’ journey through the support experience greatly improves your business over time.
Once you’ve completed your initial experiments, go back to the journey map to choose another high-value interaction. Iteration means recognizing that you can always optimize the journey and become better at helping your customers.
Through constant evolution, you ensure your company stays on top when it comes to customer service!
If you’re looking for more information on the support journey, here are a few of our favorite readings:
- The Truth About Customer Experience – HBR
- Customer Experience 3.0 – John A. Goodman
- How Customer Journey Mapping Helps Strengthen Your Online Channel – VWO
- Customer Journey Mapping – Convince and Convert